We Figured Out How to Make Frozen Cheesecake Dipped in Chocolate… on a Stick
With all due respect to the NYC cheesecake scene, anyone who knows what is what knows that Chicago has its own iconic and legendary cheesecake tradition, and the pinnacle of cheesecake perfection is the famous Eli’s Cheesecake. What began in the late 1970s as a dessert on the menu of a local steakhouse blossomed into an independent cheesecake company by the mid-1980s and has grown over the decades into one of Chicago’s most beloved culinary treasures.
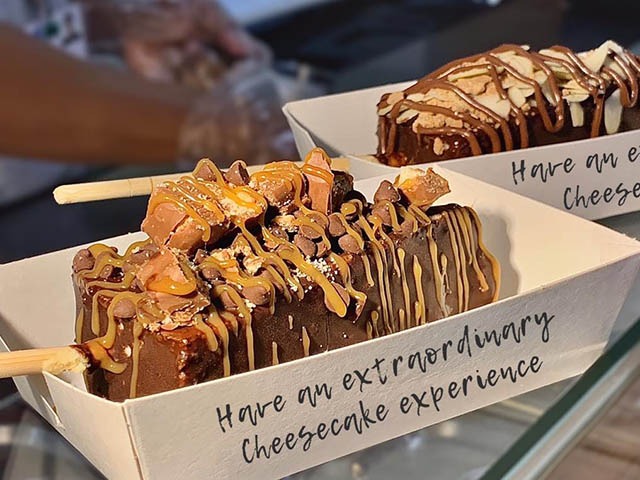
Over the years Eli’s has expanded its offerings, but the high-water mark for me was when it introduced the Dipper, a frozen slice of chocolate-dipped cheesecake on a stick. Yeah. Take a moment to absorb how delicious every aspect of that idea is, we’ll wait.
The genius of frozen, chocolate-dipped cheesecake on a stick
Dippers have long been one of my secret weapons for large parties, especially in summer. A terrific surprise, these fork-free treats are easier to eat than ice cream novelties, because they do not melt! No dripping. They come individually wrapped, so you can keep them on ice. For parties I layer my trusty Yeti cooler with frozen ice packs and put the dippers on top. With the lid closed, they will stay fresh and fabulous for hours.
But what if you need some customization? Eli’s makes dippers in only a couple of flavors and styles, so if your favorite version isn’t available or you want a gluten-free or non-chocolate option? What if you want a flavor combo that is not available for order? I knew I needed to hack those dippers!
How to make your own dippers!
Ultimately, it is not terribly hard to DIY a dipper for yourself. They key is more technique than recipe.
Obviously, you want to begin with a cheesecake. It can be store-bought or homemade. You can order your favorite flavor from Eli’s or make your own. Smaller cheesecakes work better: If you are ordering or making your own, think about a 6–8-inch cheesecake instead of larger 9-10 inches. Larger cheesecakes make slices that can be a bit harder to dip and eat.
Here’s all you do:
1. Slice your cheesecake into as many slices as you like but remember that if you go too thin it can be hard to get the stick secured.
2. Allow the cheesecake to come to room temperature, at least an hour out of the fridge (cold cheesecake is likely to crumble or split when inserting the stick).
3. Using plain popsicle sticks, carefully slide the stick into the wide end of the cheesecake slice (I do mine vertically, which I find is easier than horizontally for protecting the structural integrity of the slices.
4. Using a spatula to carefully transfer the slices, arrange on a parchment-lined sheet pan and put in the freezer, uncovered, overnight. You want the slices frozen rock hard.
5. To dip, make a coating by using the recipe below. You can use any chip or feve, so if you don’t want chocolate, try butterscotch or peanut butter chips, or go for one of the fruit or nut flavors of Valrhona Inspirations!
6. Line a new sheet pan with parchment and put in the freezer to chill while you make your dip.
7. To make your coating, melt 2 cups chocolate or flavored chips with 3 tablespoons coconut oil and a pinch of salt. Mix until smooth, transfer to a tall container that is wide enough to dip your slices with a good half-inch clearance all around. Let cool slightly until still liquid but not hot to the touch. If you are making a lot, you can double this recipe.
8. Remove the frozen cheesecake and the extra sheet pan from the freezer. One at a time, gently dip the frozen slices into the dip to coat, then transfer to the new chilled sheet pan. Once they are all dipped, return to the freezer, uncovered, to solidify.
9. Once fully frozen, you can transfer to a freezer container for serving on a platter, or you can put each dipper into individual ziptop freezer bags to serve in a cooler.